AddThis!

Greetings

Greetings from Boston, Massachusetts Postcard
Hi, Primmies... I stitch reproduction antique samplers and dolls. I also have lots of great artists and their sites featured as well as tutorials and some recipes for you to enjoy. Eventually we will have our own items for sale. Until then I hope you will enjoy the content, please leave a comment on any post you wish to.

Thank you,
Susan


Please Visit My Followers

Please Visit My Followers

I'm So Happy About My New Friends!

PLEASE FOLLOW ME ON LINKY

Pages

Showing posts with label fall decorating. Show all posts

September 22, 2011

Fabric Pumpkin Tutorial By Lynne for The Primitive Pantry

THE PRIMITIVE PANTRY
FABRIC PUMPKIN SEWING TUTORIAL 
Stuffing
Strong Quilting Thread or Upholstery Thread
Darning or Upholstery Needle
Garden Twine or String or Embroidery Thread
Glue Gun and Glue Sticks
Strong Cotton or quilting cotton
Cinnamon Stick Or Other Sticks/stalk


Start with A4 size of fabric*
Cut in half lengthwise


Fold in half across the length and sew short ends together
Sew a running stitch around one end of fabric and
Pull together and knot tightly
Turn right side out
Repeat for open end
Fill with stuffing, the tighter you stuff the tighter the
Pumpkin will finish
Pull the thread to gather and tie off, leaving a small hole.


Use the palm of your hand to roll the pumpkin around
To flatten and get to the shape you like
Take darning needle and string, begin at the bottom of
Pumpkin and stitch up into the hole in the pumpkin
Go down through the middle and out the bottom,
Repeat for all sections


Tie off and cut excess string
If you have some creases down the sides of the
Pumpkin gently push some extra filling in through
The top hole and work into each of the segments to
Make them fuller
Take cinnamon stick, cut half, cut 2 small fabric circle
(You can make the stars green or rust if you like contrast like I do)


And star shape cut slits in 1 circle and star shape
Push cinnamon stick through star shape and circle
Glue to top of pumpkin pushing stick into hole and
Pushing down circle and star
Glue circle to bottom end of pumpkin to cover stitches


*You can vary the size of pumpkins,
just make sure the fabric length is double the width
I hope you can use this tutorial to make lots of pumpkin pods and some nice, big
fat ones to scatter about your house. Use lots of different colors, white, black, green and rust.
Different fabrics can give you all kinds of looks. You can also make larger ones from 
muslin and follow the same instructions, just paint them orange (dilute craft paint with
water)or any other color you wish and then grubby them with 3tbs. coffee crystals in 1 c hot water, paint  it on your pumpkins and then rub with ice tea crystals. They absorb into the fabric for a good grubby look, cinnamon tends to stay on top and rubs away and is a little grittier. If you don't want to paint just get different colors of fabrics (wash to remove the sizing). Experiment on scraps of fabric/painted fabric and find the look you like. The grubby mix will get into the nooks and dimples of the pumpkins. You can spray a very light coat of spray adhesive to help your cinnamon/ice tea crystals stay on.   Have fun today!
Susan


Copyright The Primitive Pantry

September 20, 2011

It's National Flower Week! Let's Celebrate With New Fall Offerings From Some Noteworthy Blogs

One of my favorite artists in painting and florals is Denise of 
Country Creations By Denise. She had a giveaway not too long ago
and here is her latest tree, Spookie and Friend. She paints in country,
folk art and primitive style. Many of her containers are unique flea
market items that she paints on with her unique flair. She also loves
painting saltboxes. She also creates many kinds of Christmas trees 
and hand paints unique containers for them. You can also find her
work on eBay, ID 3148denise in the hand painted section.

Spooky and Friend Halloween Tree


Country Creations By Denise

Note the painting on the tree container and the ornament closeups. I love her work.


These next lovelies are created by Sheila of Country Impressions Floral and Decor, her selling blog.  She also has another blog to follow called Seasons Of Thy Heart. Sheila is a very talented artist who has passed along that artistic creativity to her children. 
She also loves to thrift shop and go to garage sale. She often finds
unique items and re-purposes them, incorporating them to use in
her beautiful creations. She loves the fall season but loves to decorate with her husband in all of the seasons, inside their home and outside
as well. She's a very sweet lady.


Lovely Painting Little Prim Witch With Black Cat


These are beautiful Fall Light Boxes


Next post will be on tutorials and pattern I found for Antique Turkey Tracks quilt and a super simple Fabric Pumpkin tutorial.
Some more of those yummy recipes I keep finding, too!


'Nite, Primmies...   


September 18, 2011

Good Afternoon, Primmies,

This free project is so easy, you really don't need instructions. They are called Cat Pencil Toppers but for prim projects, wouldn't we use a nice stick from the yard or a wooden dowel
stained or painted? They could be put together as a "bouquet" and planted in a rusted flower-
pot (see post for rusting with spray paints). Or, they could be held by a prim doll or cat
or bear, you get the idea...
Photo and Instructions By Better Homes and Gardens

FELTED WOOL CAT PENCIL TOPPERS

A few quick stitches are all it takes to sew these cute cat pencil toppers for Halloween.

WHAT YOU WILL NEED:

Scraps of felted wool (Choose different colors for the face, eyes, and nose.)
Freezer paper
Pencil for tracing
Perle cotton or wool thread (in black and orange)
Fiberfill
Unsharpened pencil
Ribbon
How to Make It
Download BHG free cat template here.

To felt wool, machine-wash it in a hot-water wash, cool-rinse cycle with a small amount of detergent; machine-dry and steam press.
Lay the freezer paper, shiny side down, over the pattern. With a pencil, trace two head shapes, two eyes, and a nose. Cut out the freezer-paper shapes.
Using a hot, dry iron, press the freezer-paper shapes onto your fabrics (use different colors for cat face, eyes, and mouth); let cool. Cut out the fabric shapes. Peel off the freezer paper.
Position the eyes and nose on the cat face. Use the black perle cotton to blanket-stitch each eye in place. Use the black perle cotton to make a French knot in the center of each eye for the pupil.
Use the orange perle cotton to blanket-stitch the nose in place.
Straight-stitch the whiskers and ear marking (as shown in the photo).
Place the appliqued cat face on top of a plain head shape with the wrong sides facing togehter; baste, leaving an opening at the bottom.
Using the orange perle cotton, blanket-stitch around the cat face. Stuff with fiberfill, then place the cat head on the eraser end of an unsharpened pencil. Tie a ribbon around the pencil underneath the cat head.

They are so inexpensive and quick to make they could be a freebie included with one of your customers' orders or made up in a floral arrangement in a rusty tin can and have as a giveaway on your blog. You can add a strip of burlap fashioned into a bow or tied under the heads, raffia or rag strips tied and left to hang or fashioned into a simple bow. I'm sure you can think of more ideas (two criss-crossed added to a fall wreath where you add your nice wreath bow). O.K., I'll stop now...
Warm Regards,
Susan

www.bhg.com © Copyright 2011, Meredith Corporation. All Rights Reserved

September 16, 2011

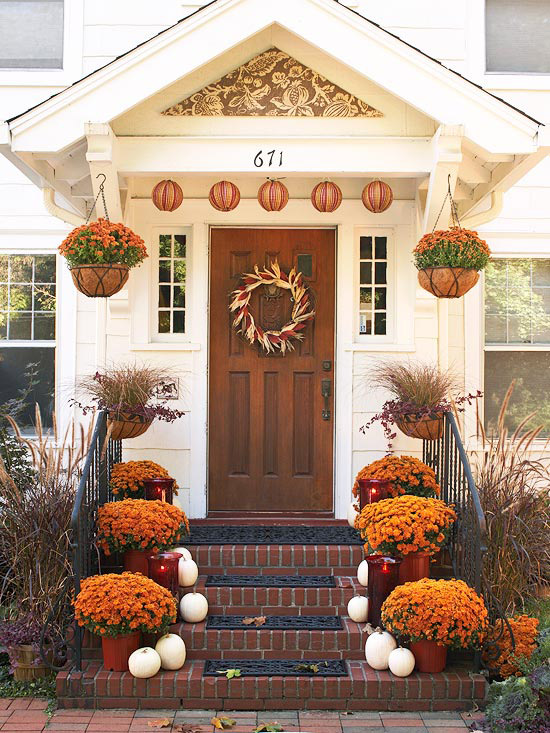
Inspiring Fall Decorating Ideas and A Yummy Gingerbread Muffin Recipe

Hi, Primmies, everyone seems excited (and relieved from the heat of this summer) about the approaching Fall Season. I know I am. I'm peeping from the kitchen window several times daily to see what leaves are starting to turn. Our little baby maples' leaves have turned colors, isn't that funny? The big fellas I'm still waiting. It was early last year. Maybe this year,too.
So, I've website-hopped a little and here's some pretty ideas for decorating and a Gingerbread
Muffin recipe (who doesn't love gingerbread?)


Gingerbread Pear Muffins
Makes: 12
Prep: 25 minutes Bake: 15 minutes Cool: 10 minutes
Recipe from Better Homes and Gardens
All Photographs Copyright Better Homes and Gardens

ingredients
1-1/2
cups all-purpose flour
1
tsp. baking powder
1
tsp. ground ginger
1
tsp. ground cinnamon
1/2
tsp. baking soda
1/4
tsp. salt
2/3
cup mild-flavored molasses
1/4
cup butter, melted
1/4
cup packed brown sugar
1
egg
1/2
cup boiling water
2
small pears, cut in 6 wedges each
3
ounces dark or bittersweet chocolate broken in small pieces
Raw sugar, optional
directions
1. Preheat oven to 350F. Lightly coat twelve 2-1/2-inch muffin cups with nonstick cooking spray and flour.
2. In large bowl combine flour, baking powder, ginger, cinnamon, baking soda, and salt. In a second bowl whisk together molasses, butter, brown sugar, and egg. Pour into flour mixture. Stir until combined. Whisk in boiling water. Divide evenly among muffin cups. Add 1 pear wedge to each muffin, press lightly.
3. Bake 15 to 18 minutes or until toothpick inserted into center comes out clean. Sprinkle with raw sugar. Add chocolate piece to top of muffins. Cool in pan on rack 10 minutes. Use table knife to smooth melted chocolate. Remove from cups. Cool completely on wire rack. Makes 12.
nutrition facts
Servings Per Recipe 12 Calories221 Total Fat (g)7 Saturated Fat (g)4, Monounsaturated Fat (g)1, Polyunsaturated Fat (g)0, Cholesterol (mg)29, Sodium (mg)163, Carbohydrate (g)39, Total Sugar (g)21, Fiber (g)2, Protein (g)1, Vitamin A (DV%)0, Vitamin C (DV%)2, Calcium (DV%)6, Iron (DV%)11, Percent Daily Values are based on a 2,000 calorie diet

Hope you enjoyed the ideas and the recipe.

Susan

August 23, 2011

Free Candlemat Pattern For Us

Here's a very prim Candlemat pattern from my friend Christine of Preferably Prim all the way across the pond in Northern Ireland. I love how we can meet people from all over the world, most of the time the internet is a good thing. It's a thank you to her followers for the comments on her "Wooly Pineapple" and the congratulations on her 18th wedding anniversary. This is the finished candlemat:

Here's her template for the pattern:
and her instructions:

INSTRUCTIONS:
"Cut one of each size of oval background fabric.
On the top layer, trace on the words and berry strands and stitch them in in dark colored floss.
(I used 6 strands of DMC dark brown for the words and 3 strands of the same color for the berry strands.)
Stitch on the pip berries using 2 strands of floss doing a French knot.
Using the templates, cut out 4 of each part of the acorns and stitch into position.
Now you are ready to blanket stitch the top layer onto the base layer of your mat, using 3 strands of floss.
Repeat the whole way around the outer edge of your mat.
YOU DID IT!
Admire your handiwork and enjoy in your fall decorating!
Once again, thank you for your thoughtfulness and visits - life has been so blessed since I started blogging!
Best wishes
Christine"

And, here's her "Wooly Wednesday" post of her pineapple, it's so cute it's done with little "penny rug" circles in wool felt on the pineapple:
If you want to visit her blog with the Candlemat post click HERE. Isn't her blog cute, she loves Americana and our prim style.
'Til next time, Primmies...

I Look Forward To Your Comments

Popular Posts

Blog Archive

Animal Rescue Site

Related Posts Plugin for WordPress, Blogger...

Katherine's Blog Hop

Our New Blog

Please be patient, we are still working on design and content of our new blog!

Online Visitors Counter

Page Hits Counter