Hi, Primmies... I stitch reproduction antique samplers and dolls. I also have lots of great artists and their sites featured as well as tutorials and some recipes for you to enjoy. Eventually we will have our own items for sale. Until then I hope you will enjoy the content, please leave a comment on any post you wish to.
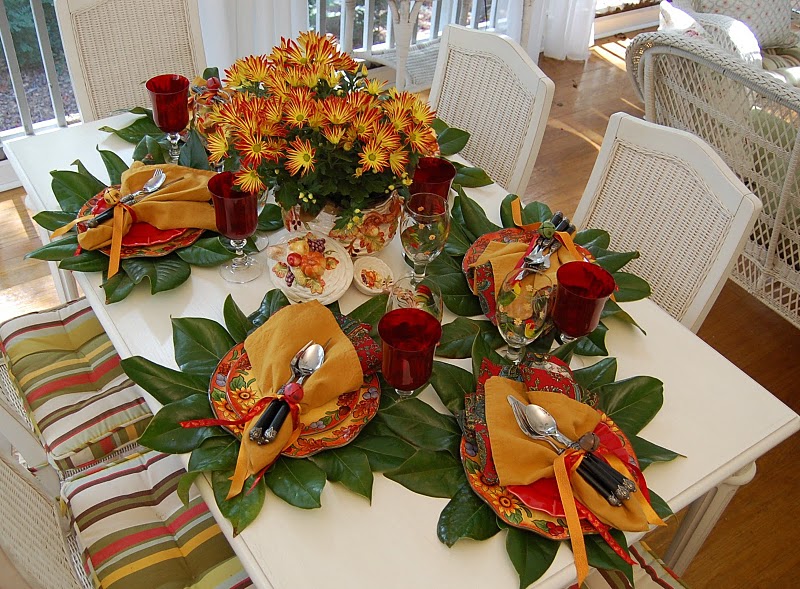
If you don't follow Susan's blog, you should! She creates these "tablescapes" and they are truly works of art. Her porch is beautiful, too. She has some historic house tours and napkin folding tutorials and other neat stuff on her blog. Here's the tablescape she did for the 1st day of Autumn:
Hi, Primmies, I'm back again with another project. There are so many ideas out there that you'd go crazy busy trying to make them all. I know I'm getting a little squirrelly being in the house and looking for things to do and post on my blog. It's fun, though, and Halloween and Autumn seem to be my favorite time of the year for decorating. It's Ashley's favorite time of the year, too, which makes it special for me. These Pumpkin Pincushions are great, who doesn't love pumpkins, and Primmies love to make pincushions.
Position the freezer paper, shiny side down, over the patterns. Trace the patterns the number of times indicated. Cut out the shapes on the traced lines. Using an iron, press a freezer-paper shape, shiny side down, onto the front of the respective fabric; let cool. Cut out the shape along the pattern edges. Peel off the freezer paper.
Applique the face features
Stitching is done with a single strand of #8 pearl cotton.Backstitch a line in the center of each mouth. Work straight stitches at intervals along the mouth lines. Backstitch a circle on the dark orange pumpkin's eye patch.
finish the pumpkinsFor the artificial-flower stem, tie a small bunch of flowers and leaves with a length of pearl cotton. Glue each stem in place.For the tape-measure stem, cut two 2-1/2-inch lengths from the tape measure. Glue a 1/4x2-1/2-inch strip of card stock between the two lengths
With right sides together and using a 1/4-inch seam allowance, sewthe fronts to the backs, leaving an opening at the top of eachpumpkin for turning; turn right side out. Stuff with fiberfill. Hand-sew the openings closed, leaving 1/2-inch openings to insert the stems.
Sew buttons in place for eyes. Glue the noses in place. You're done!
Hey, Primmies, here is another project for you. Since the weekend The tablecloth was made with black wool felt pumpkins, but of course, you can use any color or even small prints for your pumpkins. I have seen a lot of bloggers making black and also white pumpkins so I thought you'd like black and white version.I also found a stenciled Pumpkin Rug to make. Use a plain jute rug, the straw-colored rectangular type, and use pumpkin stencils and Krylon spray paint in really cool colors beyond the regular orange and green Halloween colors. I'll do that post separately since these are so long to read.Download the template Tablecloth Templates
2/3-yard of 36-inch-wide black wool felt
1 yard of 24-inch-wide, iron-on fusible web (such as Lite Steam-A-Seam)
Freezer paper
Pencil and scissors
Iron
1-1/2 yards of 42-inch-wide ivory cotton print
3 yards (2 packages) of black jumb rickrack
Sewing machine and thread
Embroidery needle
Embroidery floss: ivory
1 yard of 20-inch-wide, lightweight, tear-away fabric stabilizer (such as Sulky Tear-Easy Stablizer)
Teflon applique pressing sheet
Fabric marker
How To Make The Tablecloth 1. Download and print the free pattern2. Following the manufacturer's instructions, apply fusible web to the back of the black wool felt. Do not remove the paper backing.3. Trace the shaded areas of the pattern (corner details and pumpkins) onto freezer paper and cut out. (The freezer paper shapes will serve as a template 4. Using an iron, press each freezer paper shape, shiny side down, onto the felt. Cut out the shapes along the pattern edges. Peel off the freezer paper.5. To make the tablecloth cut two 34-1/2-inch squares from the ivory cotton print. Cut four 26-inch lengths of rickrack.6. Place one print square, right side up, on a flat work surface. Pin a length of rickrack along one edge of the print square, making sure to slope the rickrack off the fabric at each end so the rickrack won't overlap at the corners. Note: The corners of the tablecloth will not lie flat if the rickrack overlaps.7. Repeat for the remaining sides. Baste the rickrack in place.8. Using a 1/4-inch seam allowance, sew the print squares together with the right sides facing, leaving a 7-inch opening on one side for turning. Turn right side out and press. Whipstitch the opening closed.9. Position a piece of stabilizer over the pumpkin pattern and trace the pumpkin pattern, including the stitch-line guides. Repeat to make a total of four stem-and-vine stitching templates.10. Applique the tablecloth. Place a pumpkin-stitching template onto the right side of a pumpkin felt cutout, aligning all edges. Using the templates as a guide, outline the pumpkins and stems with running stitches. Note: Use three strands of floss for all stitching. Carefully remove the stabilizer by placing your thumb on the stitches and pulling the stabilizer away from your thumb. Repeat for each pumpkin.11. Outline the ornate corners with running stitches 1/4 inch from all edges.12. Arrange the cutouts on the tablecloth, removing the paper backing as you work; hand-press the cutouts into place. To avoid scorching, place a Teflon applique pressing sheet over each cutout. Fuse all cutouts into place with an iron.13. Arrange the stem-and-vine stitching template over a pumpkin stem. Use a fabric marker to trace the vines onto the fabric. Note: When tracing, apply mild pressure with the fabric marker so that the ink will slightly seep through the stabilizer onto the fabric. Repeat for all vines.14. Lay the tablecloth on a flat surface and position a piece of stabilizer under a vine area to be stitched. Use a small zigzag stitch or satin stitch to machine-sew the vine outline. Repeat for all vines and then remove the stabilizer.
copyright BHG 2011 Meredith Corp All Rights Reserved